Backing up your data is crucial to make sure your work and personal files are safe and secure. Watch the video on how to backup your files on Windows 10 using 2 free methods and/or follow the step by step guide below on how to back up your data/files.
Backing Up Your Data Using Windows 10 Backup
All you need is your Windows 10 PC and an external hard drive.
Recommended External Hard Drives:
WD 2TB: https://amzn.to/3gSiVJr
WD 4TB: https://amzn.to/30R0y1Z
WD 10TB: https://amzn.to/2DNJqkL
(Disclaimer: The above links are affiliate links. I may receive a small commission if you purchase an external hard drive using these links. However, I would never recommend anything I don’t personally use. I appreciate your support.)
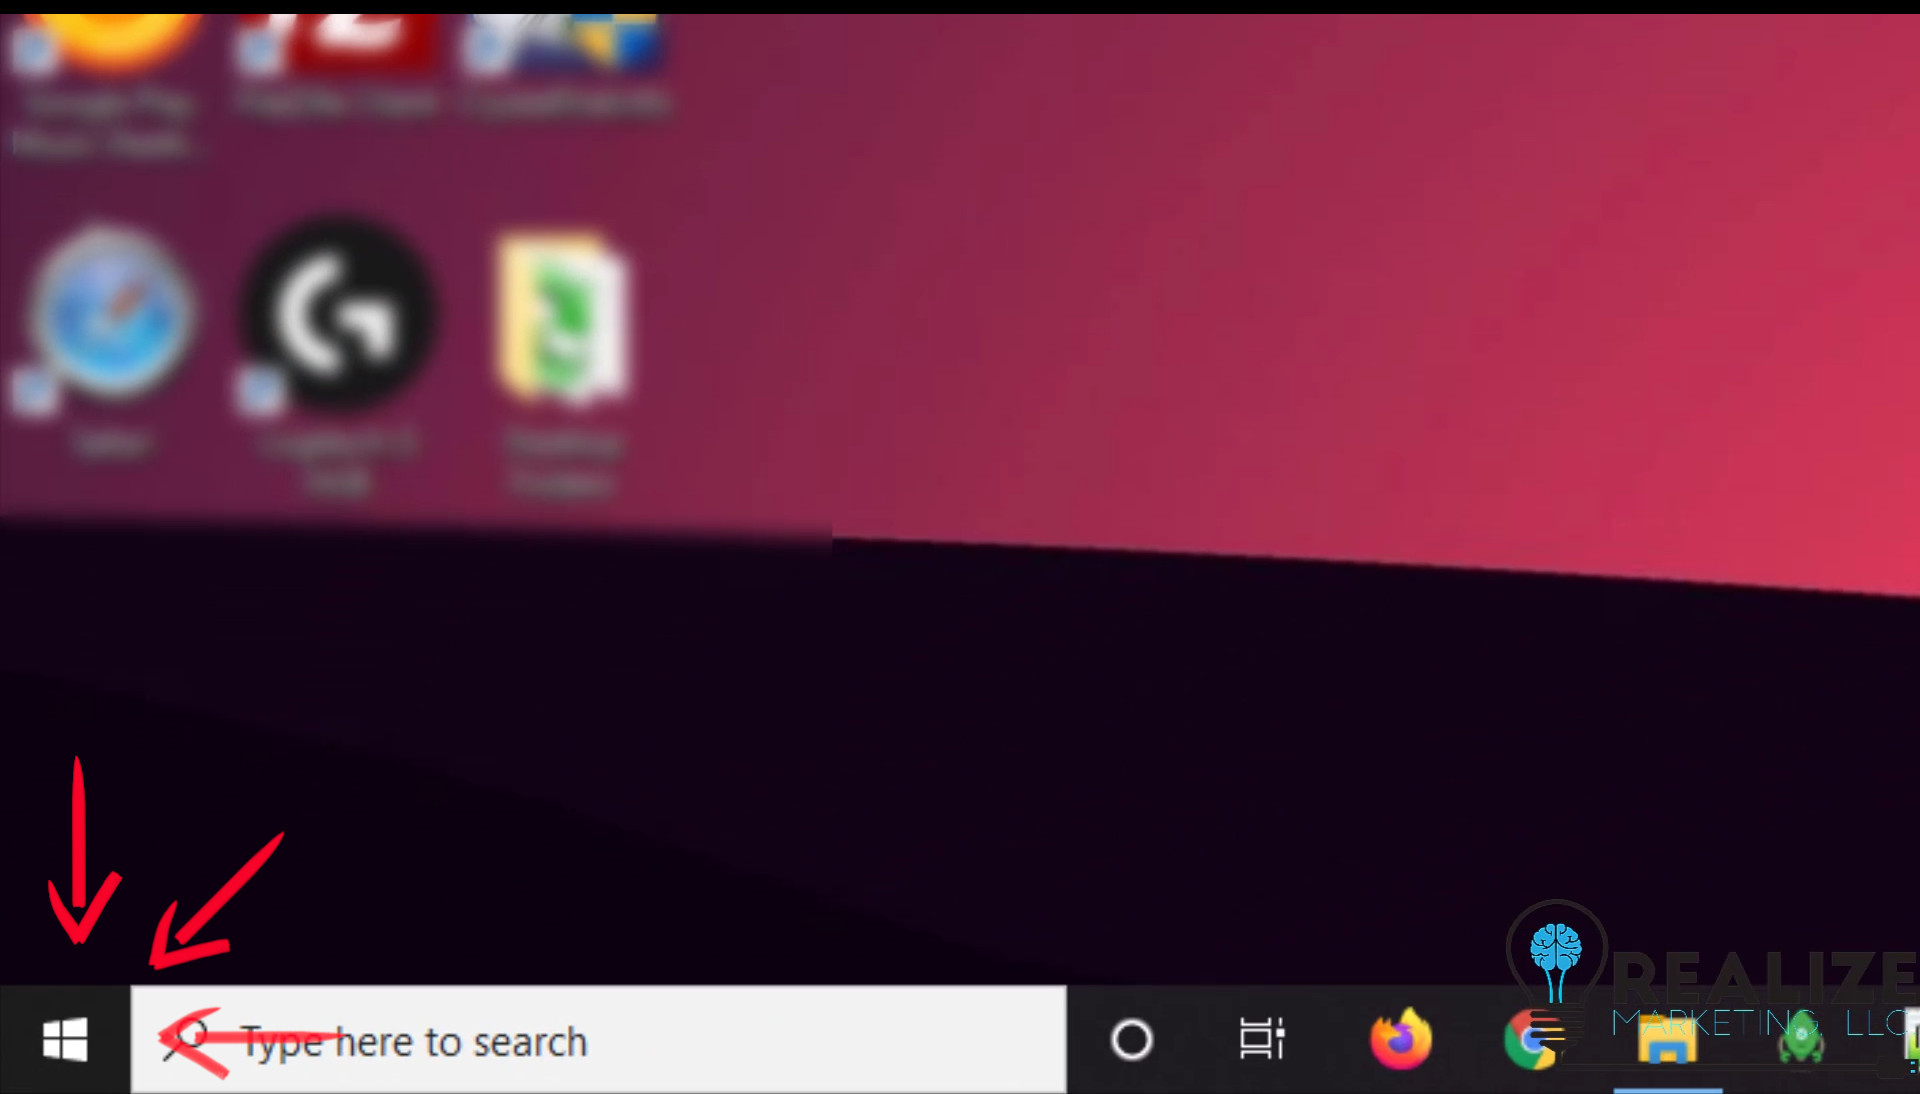
Step 1
Click the start button on the bottom left of your desktop.
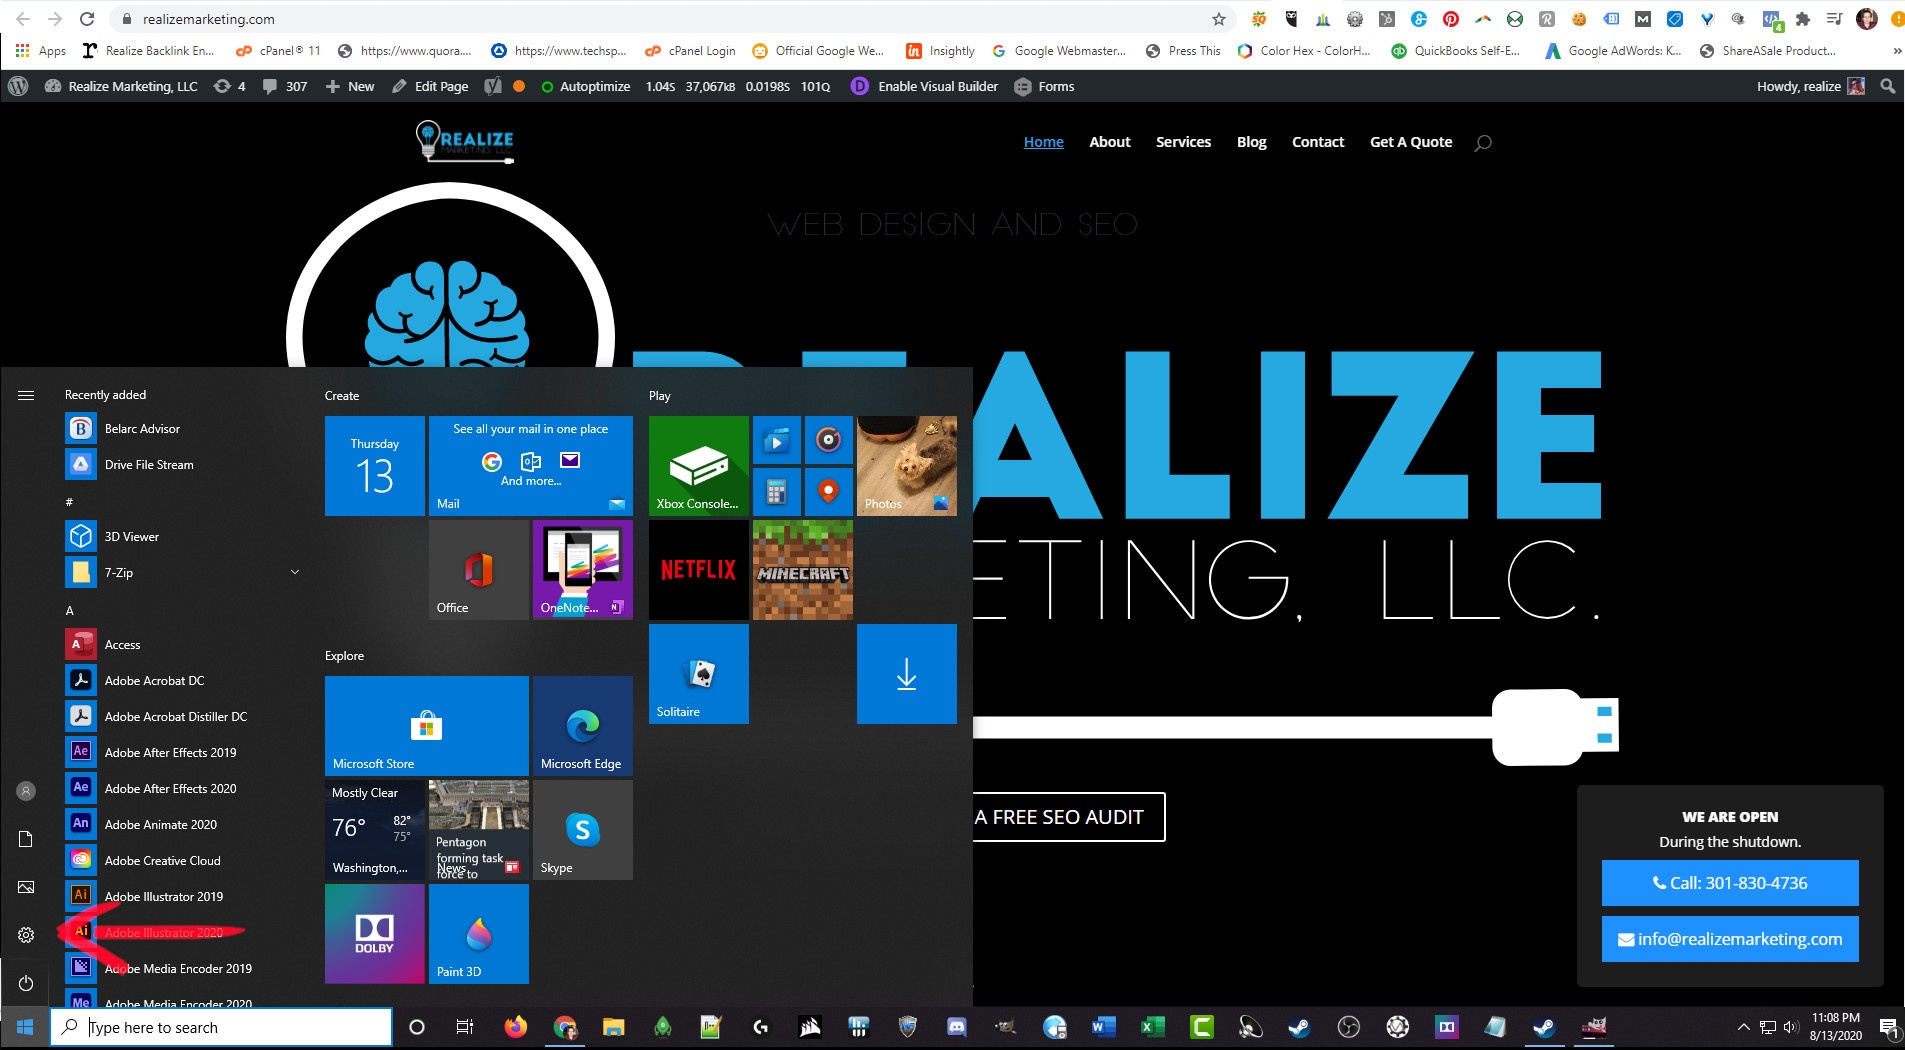
Step 2
Click the settings cog wheel
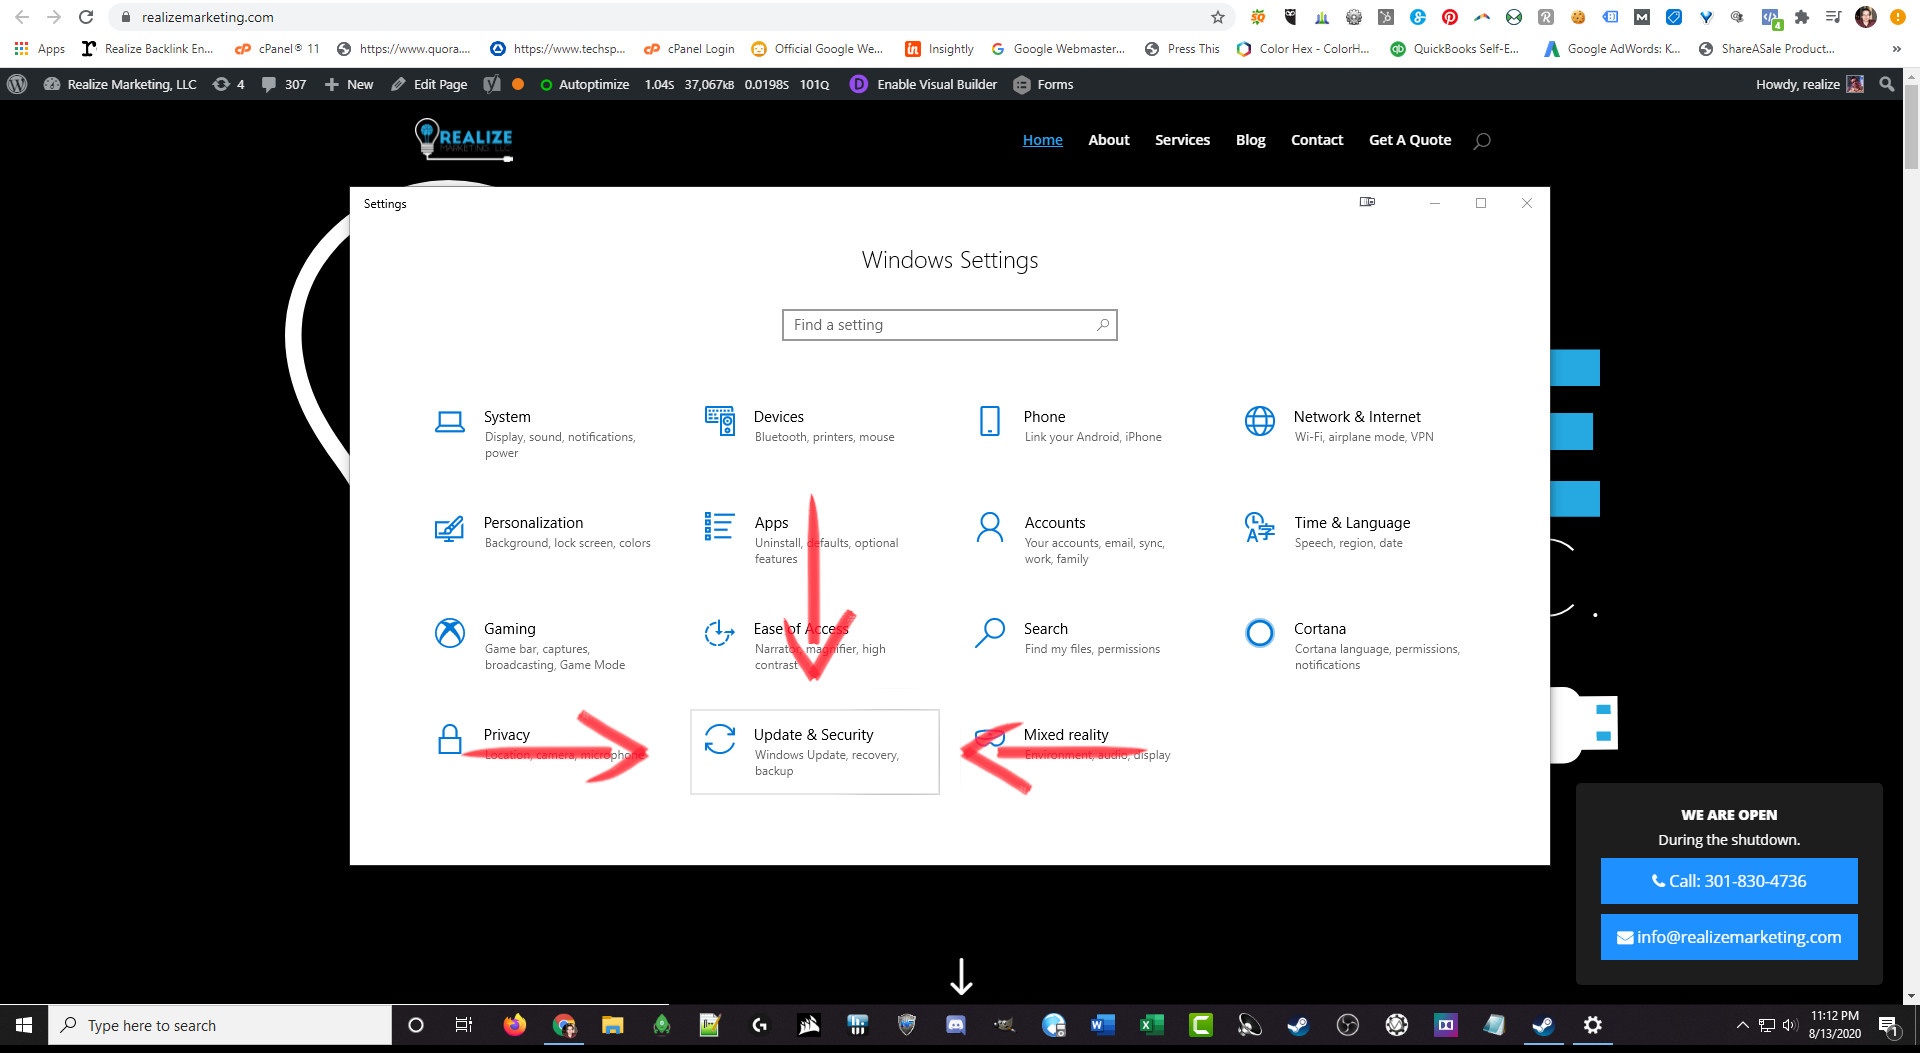
Step 3
Click Updates and Security
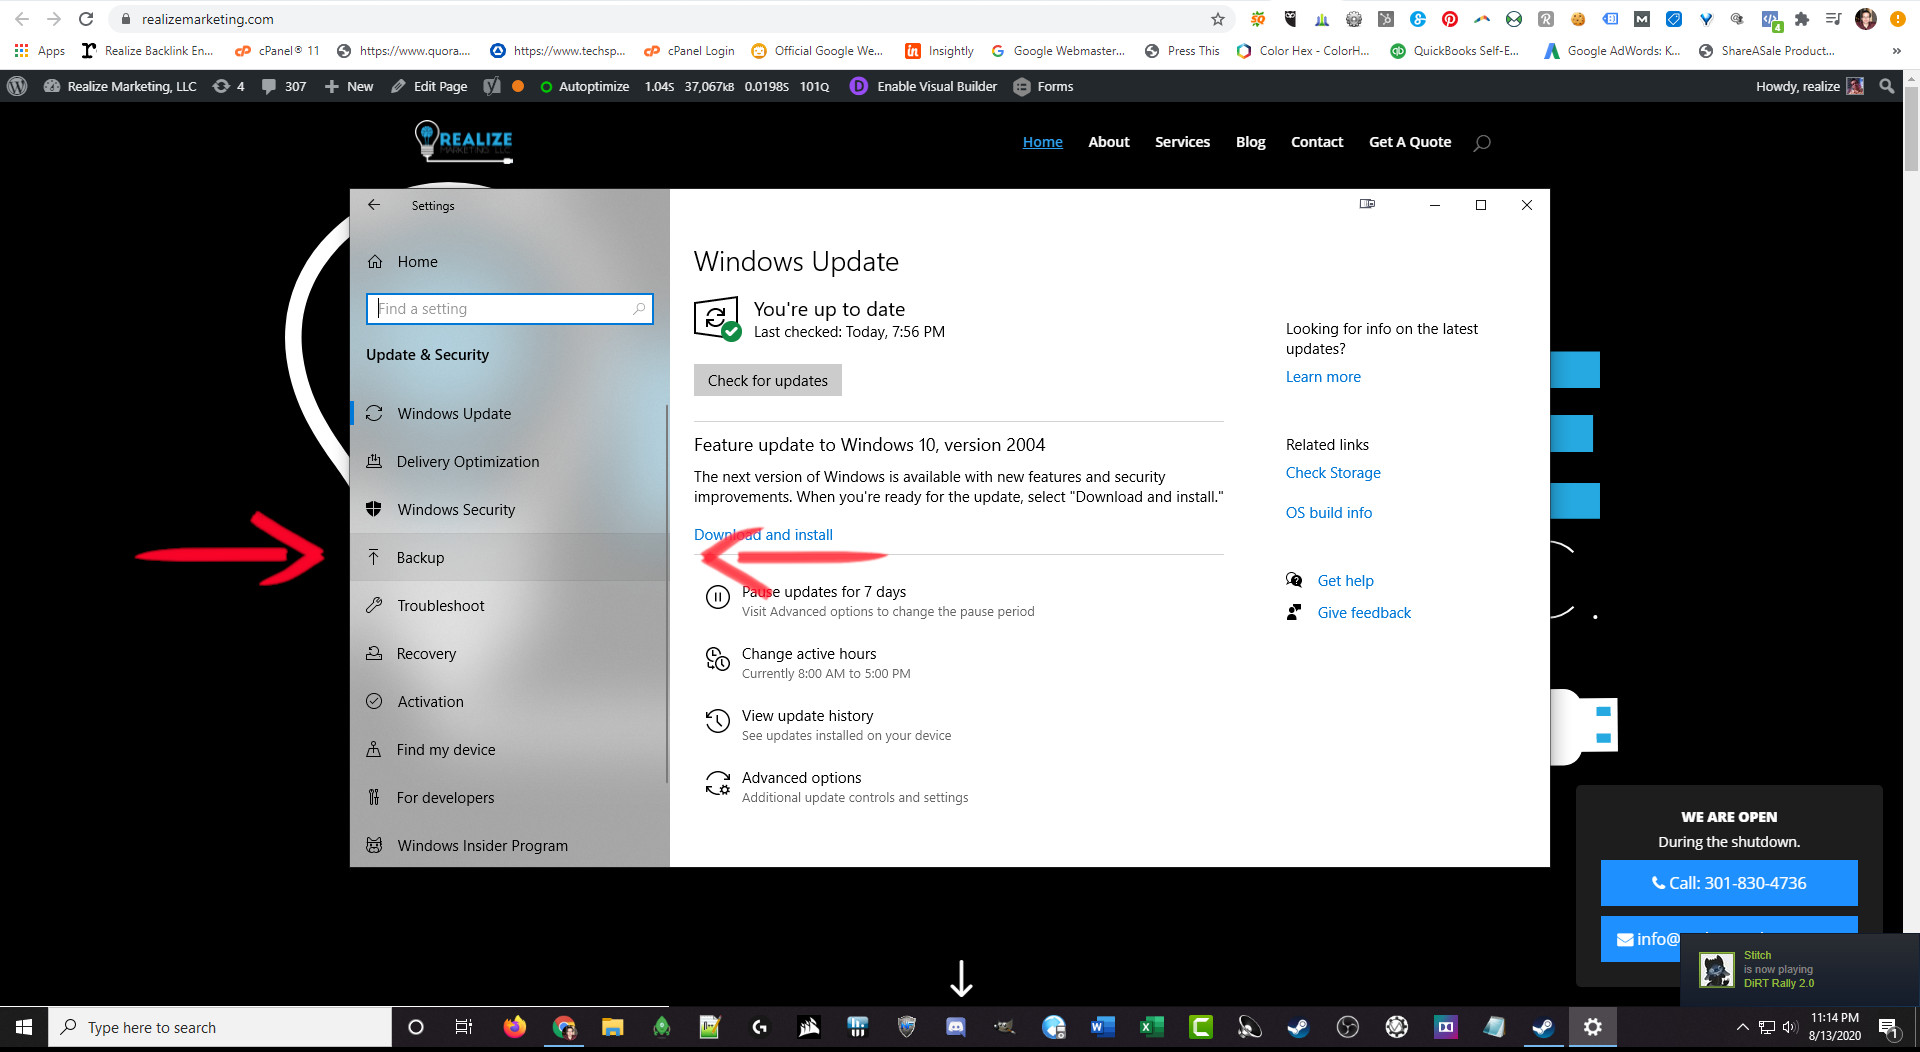
Step 4
Click Backup
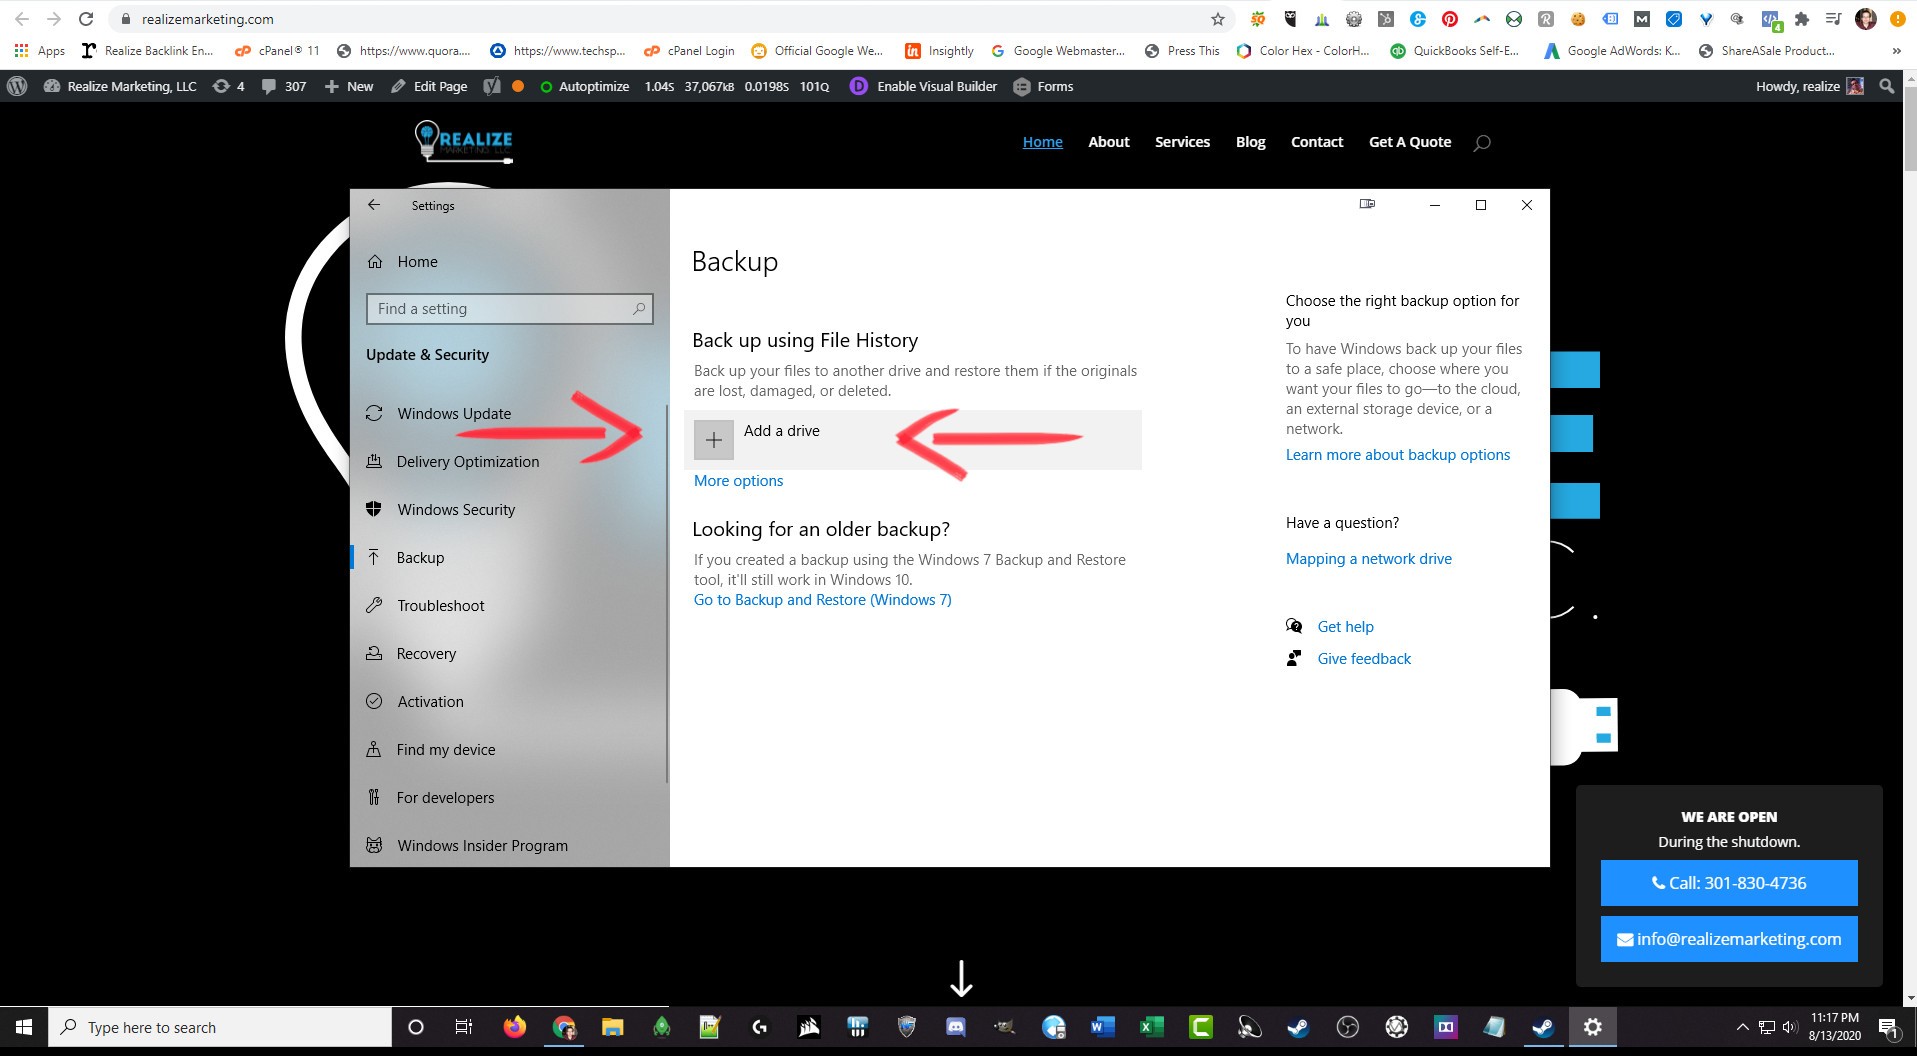
Step 5
Click Add a Drive
(Make sure you have an external hard drive connected first)
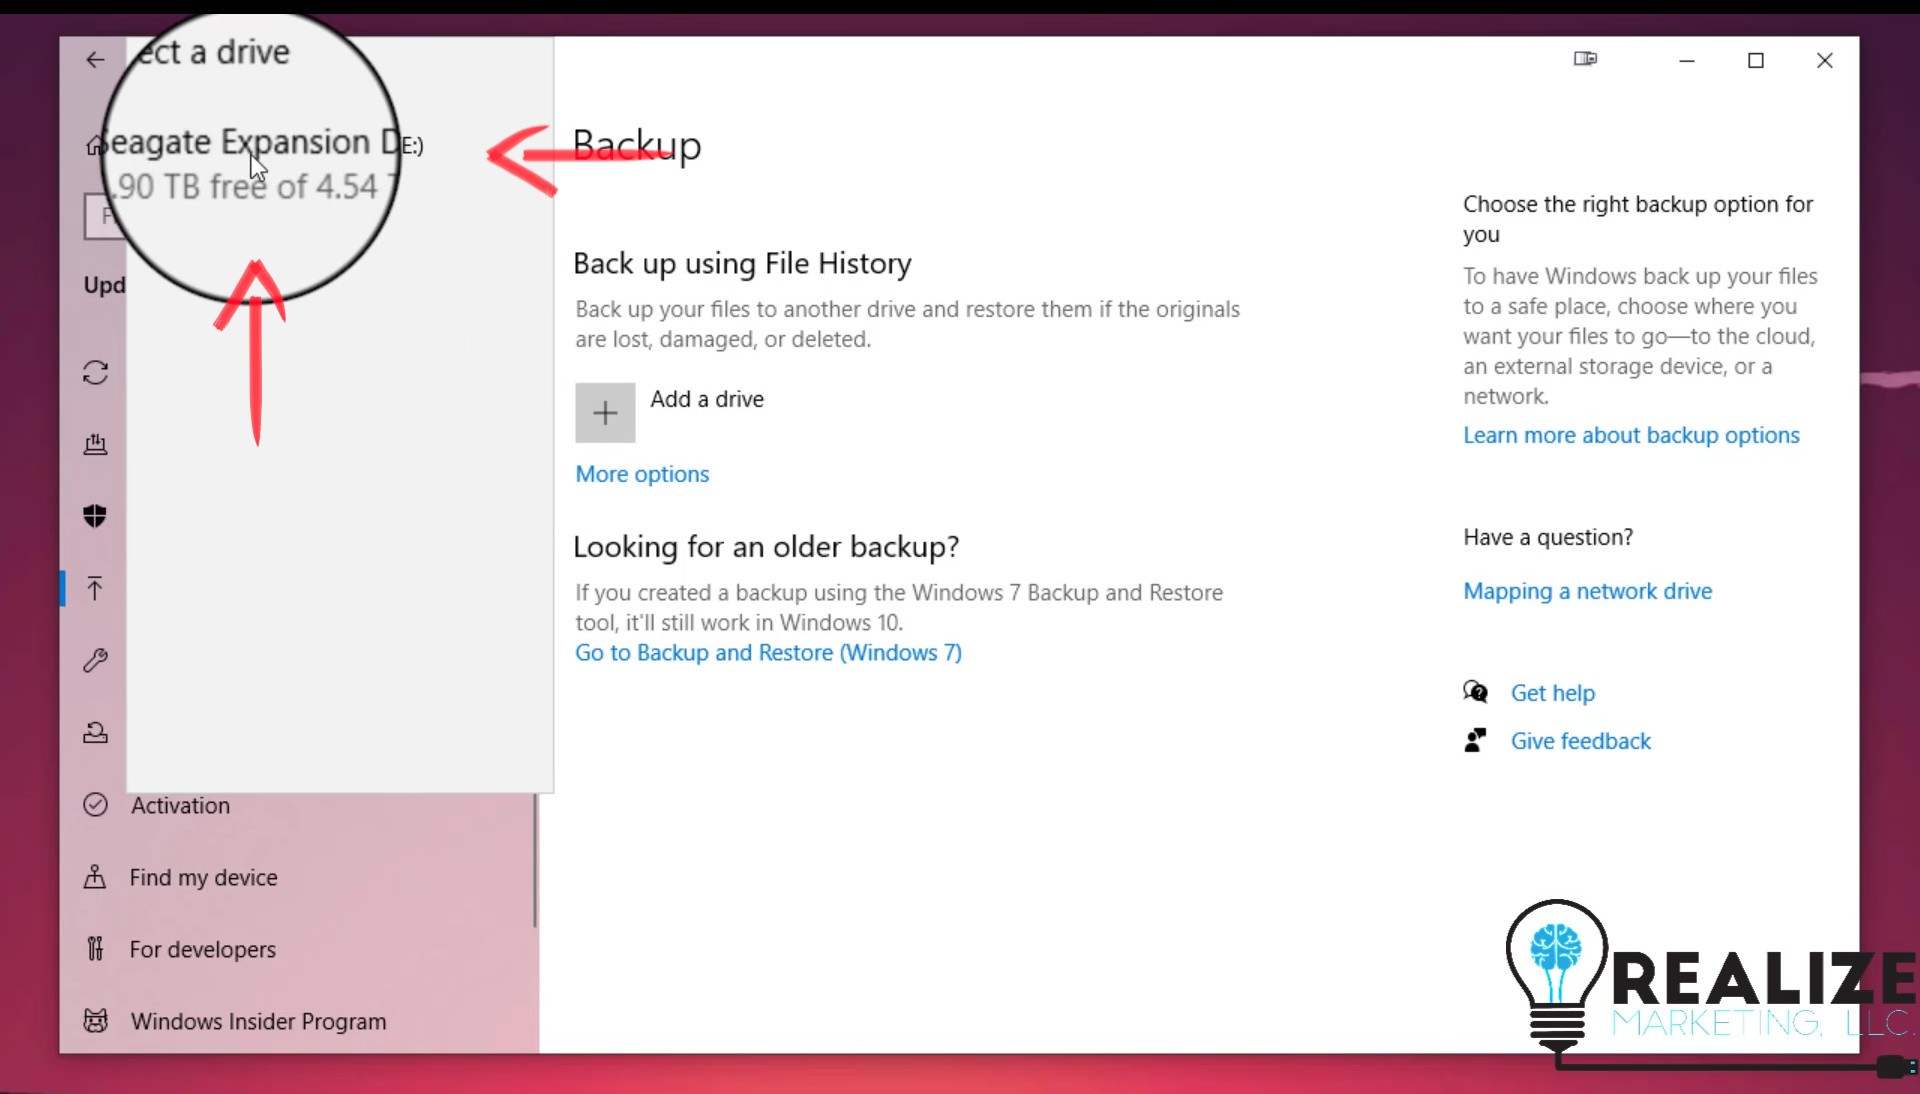
Step 6
Click to confirm the hard drive for the backup and you are done.
You are done backing up your data!
Windows backup runs hourly by default. You can change the frequency using the more options link underneath where you added the drive.
Backing Up Your Data Using Free File Sync
All you need is your Windows 10 PC, the free software “Free File Sync” and an external hard drive.
Free File Sync is better for making extra copies of your most important data. It should be used with Windows 10 Backup and not instead of it.
Recommended External Hard Drives:
WD 2TB: https://amzn.to/3gSiVJr
WD 4TB: https://amzn.to/30R0y1Z
WD 10TB: https://amzn.to/2DNJqkL
(Disclaimer: The above links are affiliate links. I may receive a small commission if you purchase an external hard drive using these links. However, I would never recommend anything I don’t personally use. I appreciate your support.)
Third Party Software Disclaimer
As with all third party software that we suggest, you use it at your own risk. We do our best to find useful and safe solutions, but we have no control over third party websites and/or software.
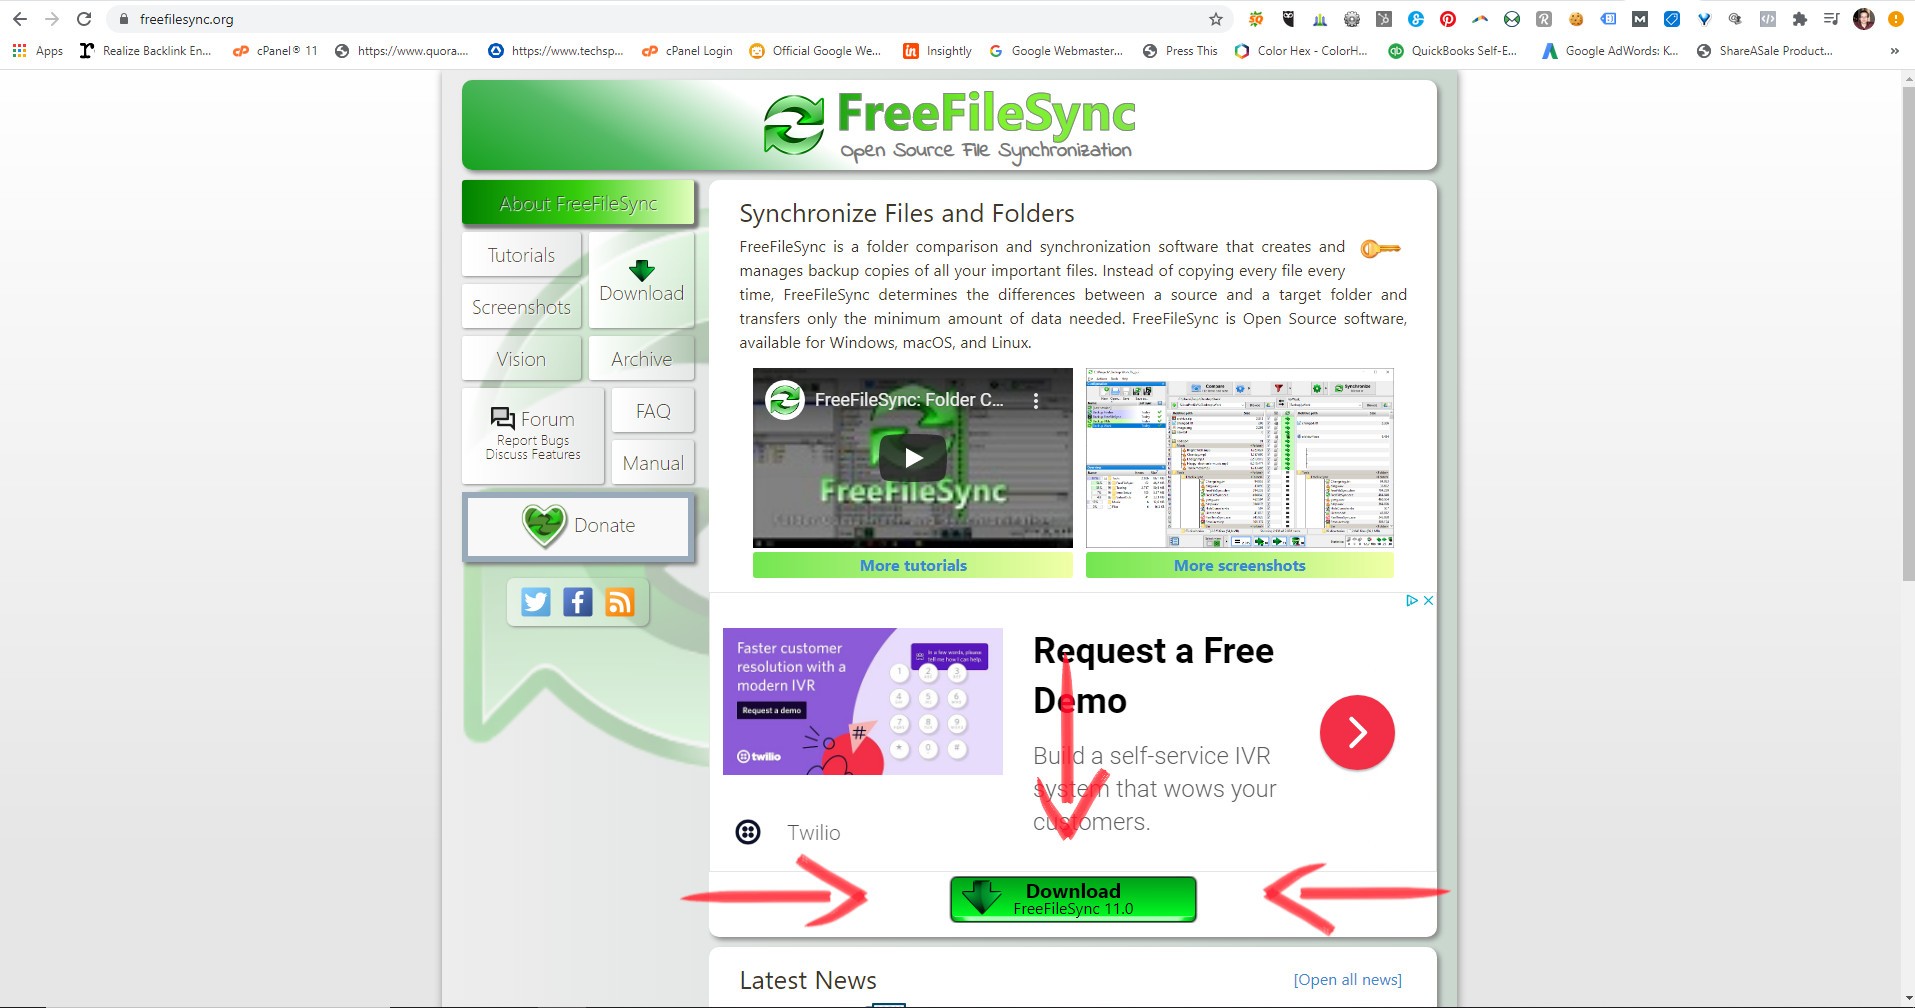
Step 1
Go to https://freefilesync.org/ and click download.
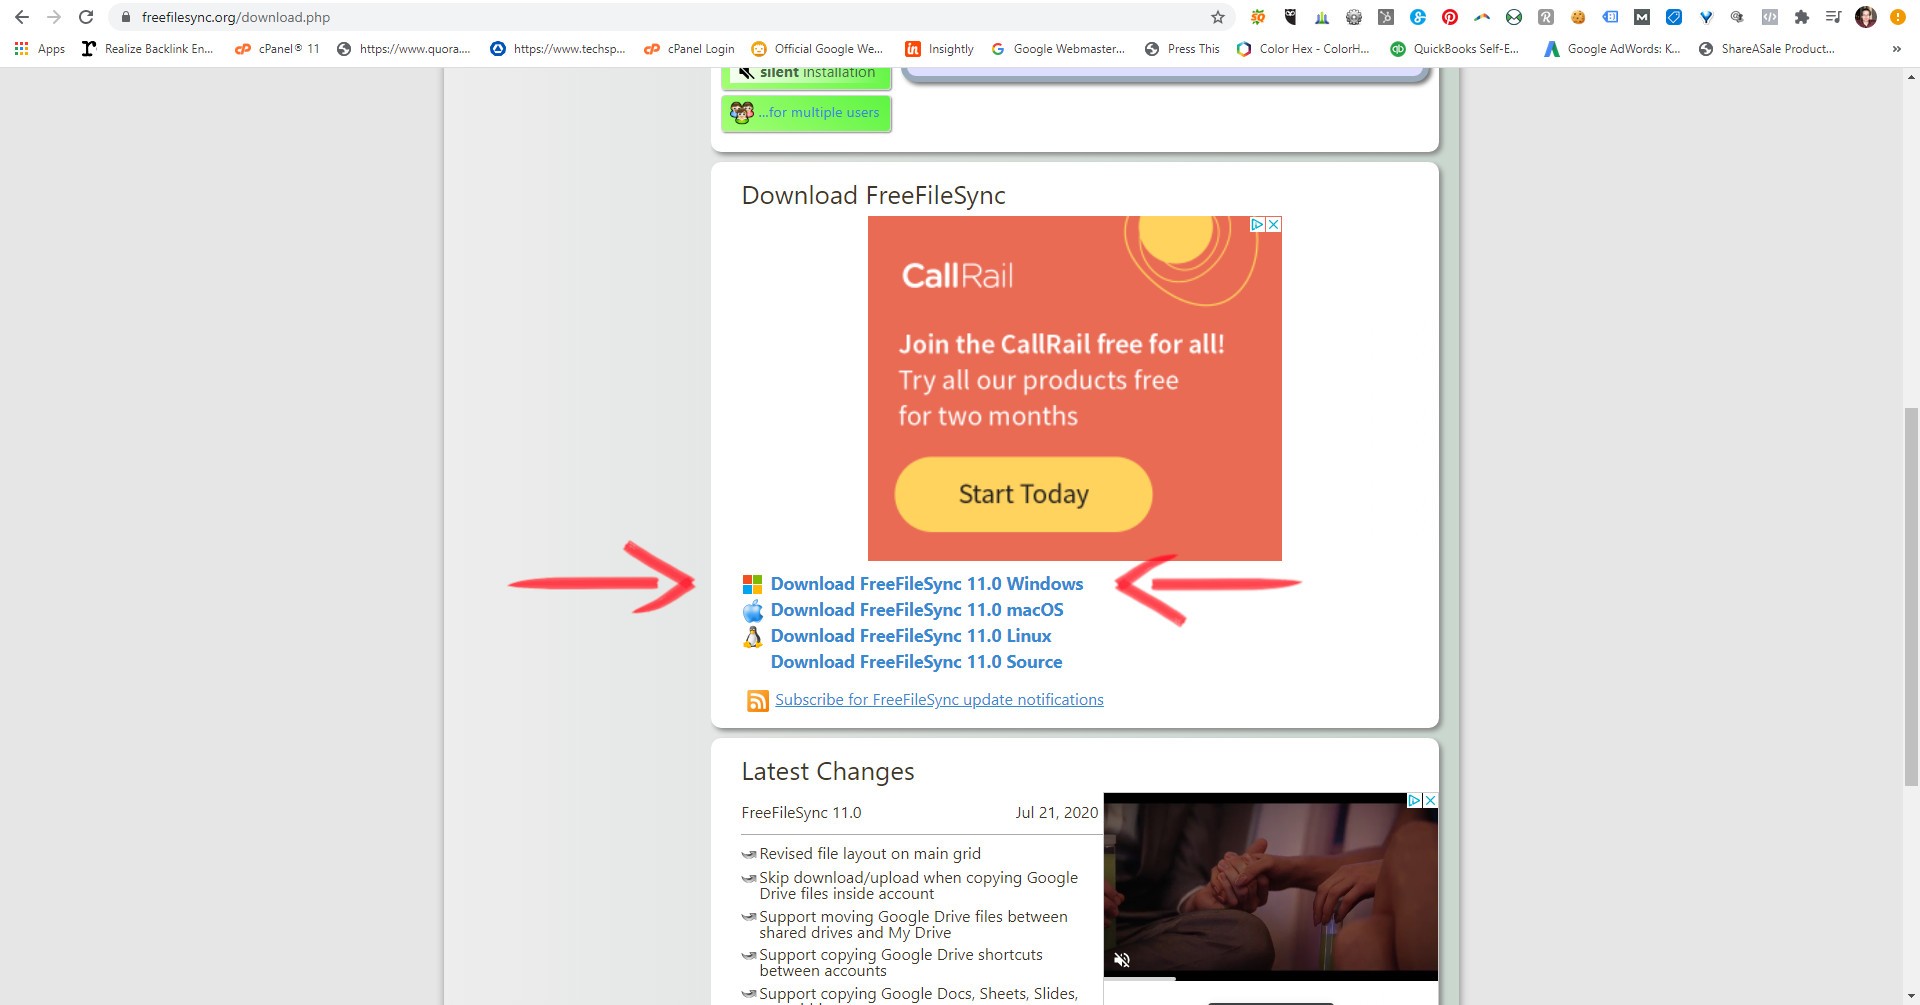
Step 2
Scroll down on the download page and select the Free File Sync version for Windows.
Step 3
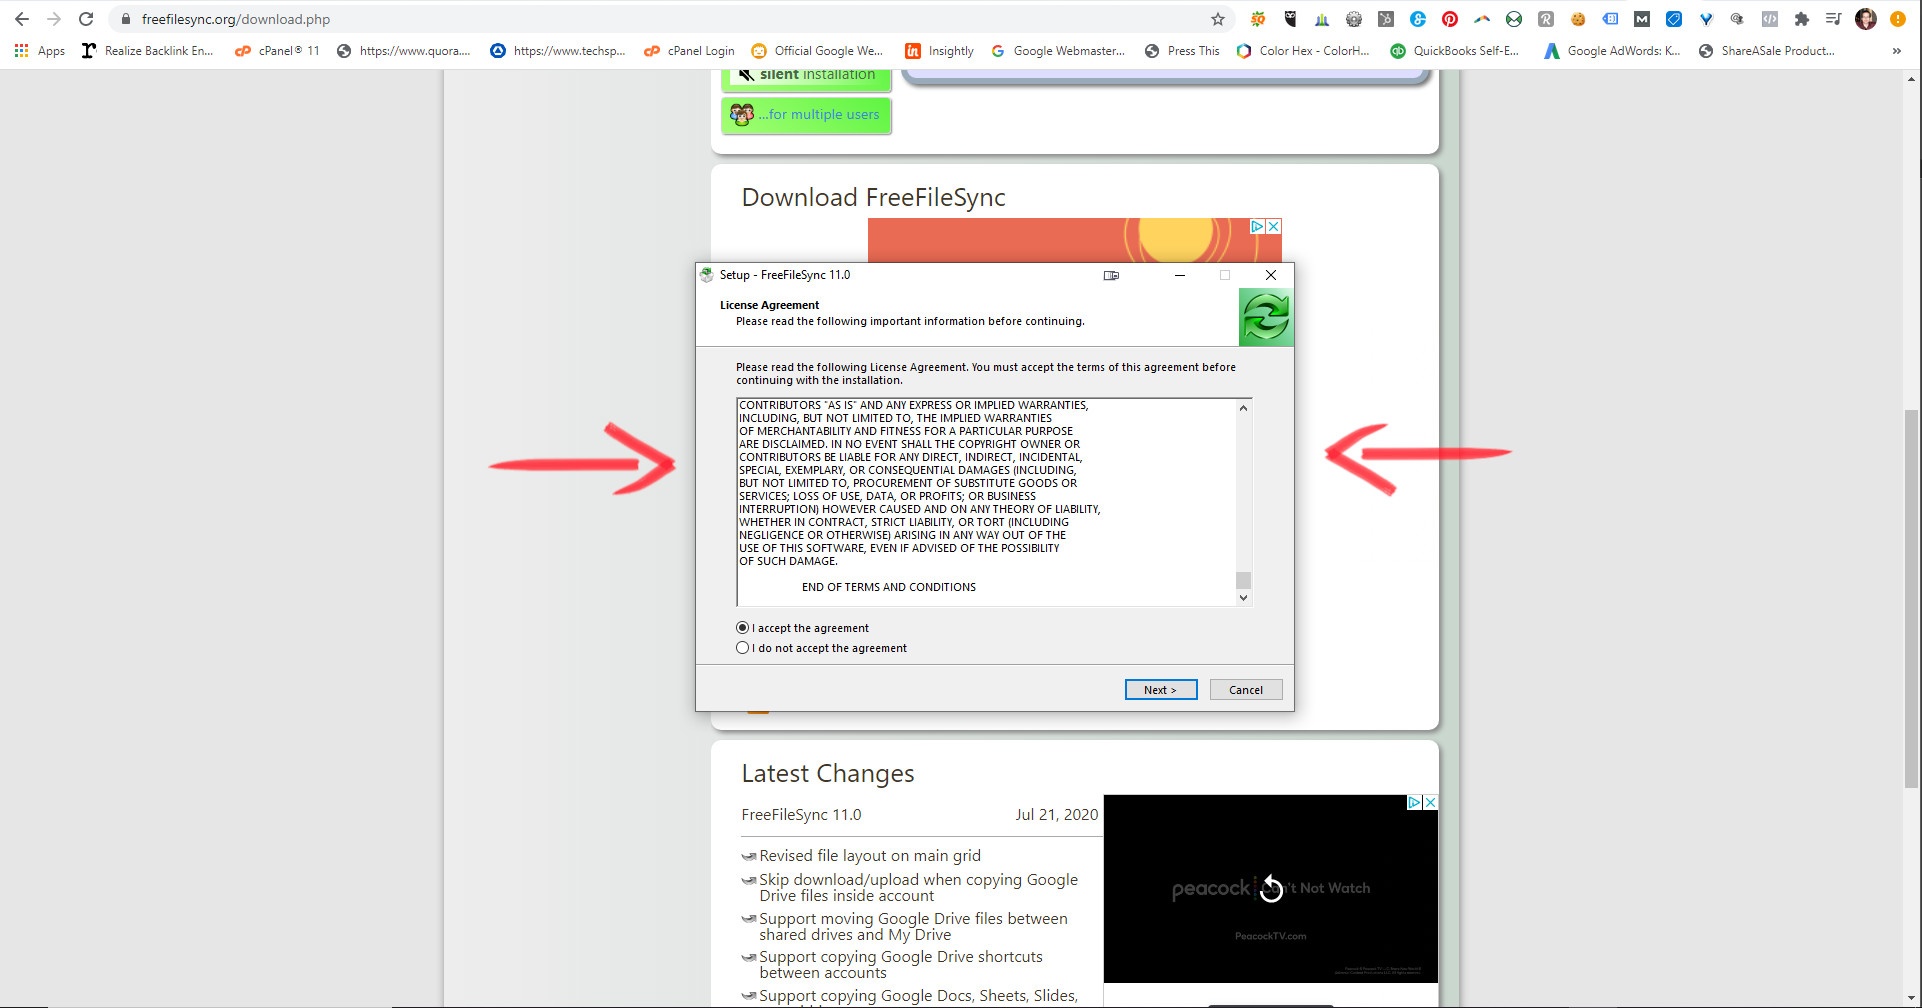
Open the downloaded program and follow the prompts to install. Make sure to read before clicking on next.
Step 4
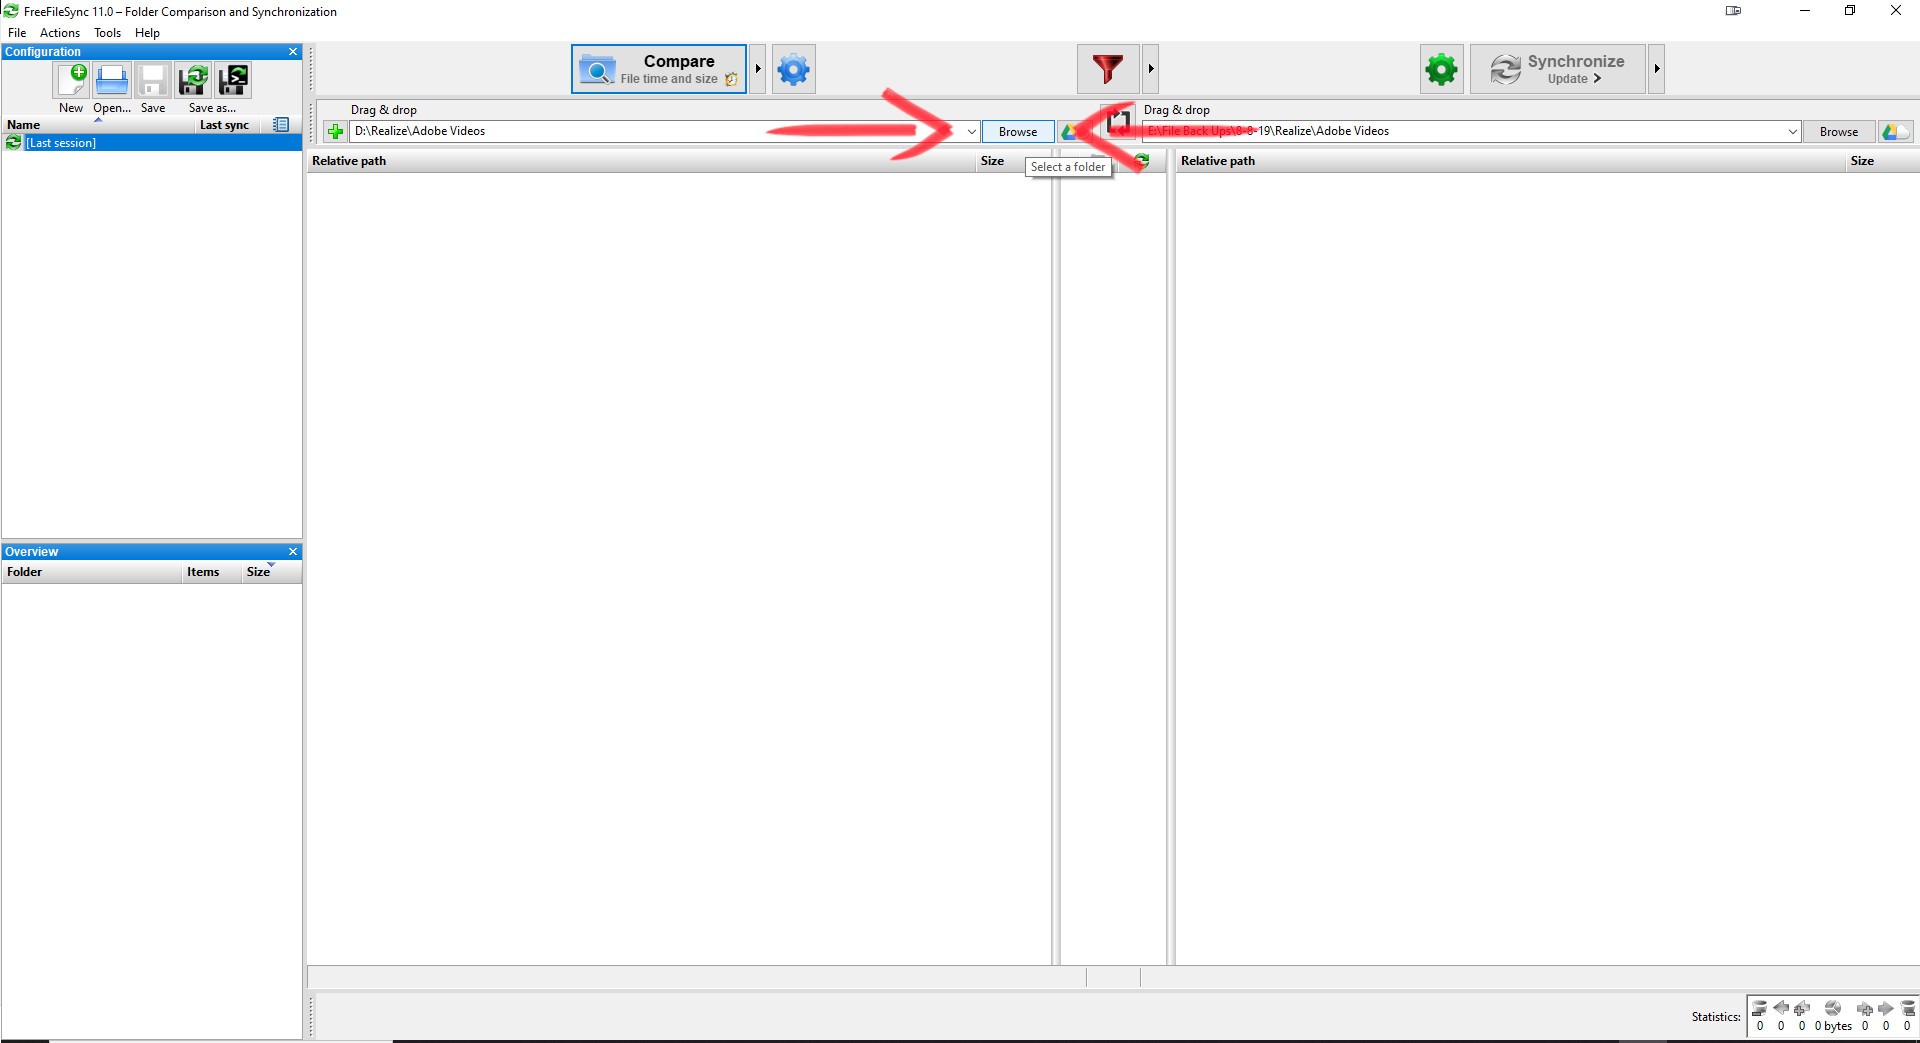
Open Free File Sync after it’s installed. A shortcut should be on your desktop. If you have trouble finding it, just use the search bar on the bottom left of your monitor to search for Free File Sync.
Then choose the folder you want to backup by using the browse button.

Step 5
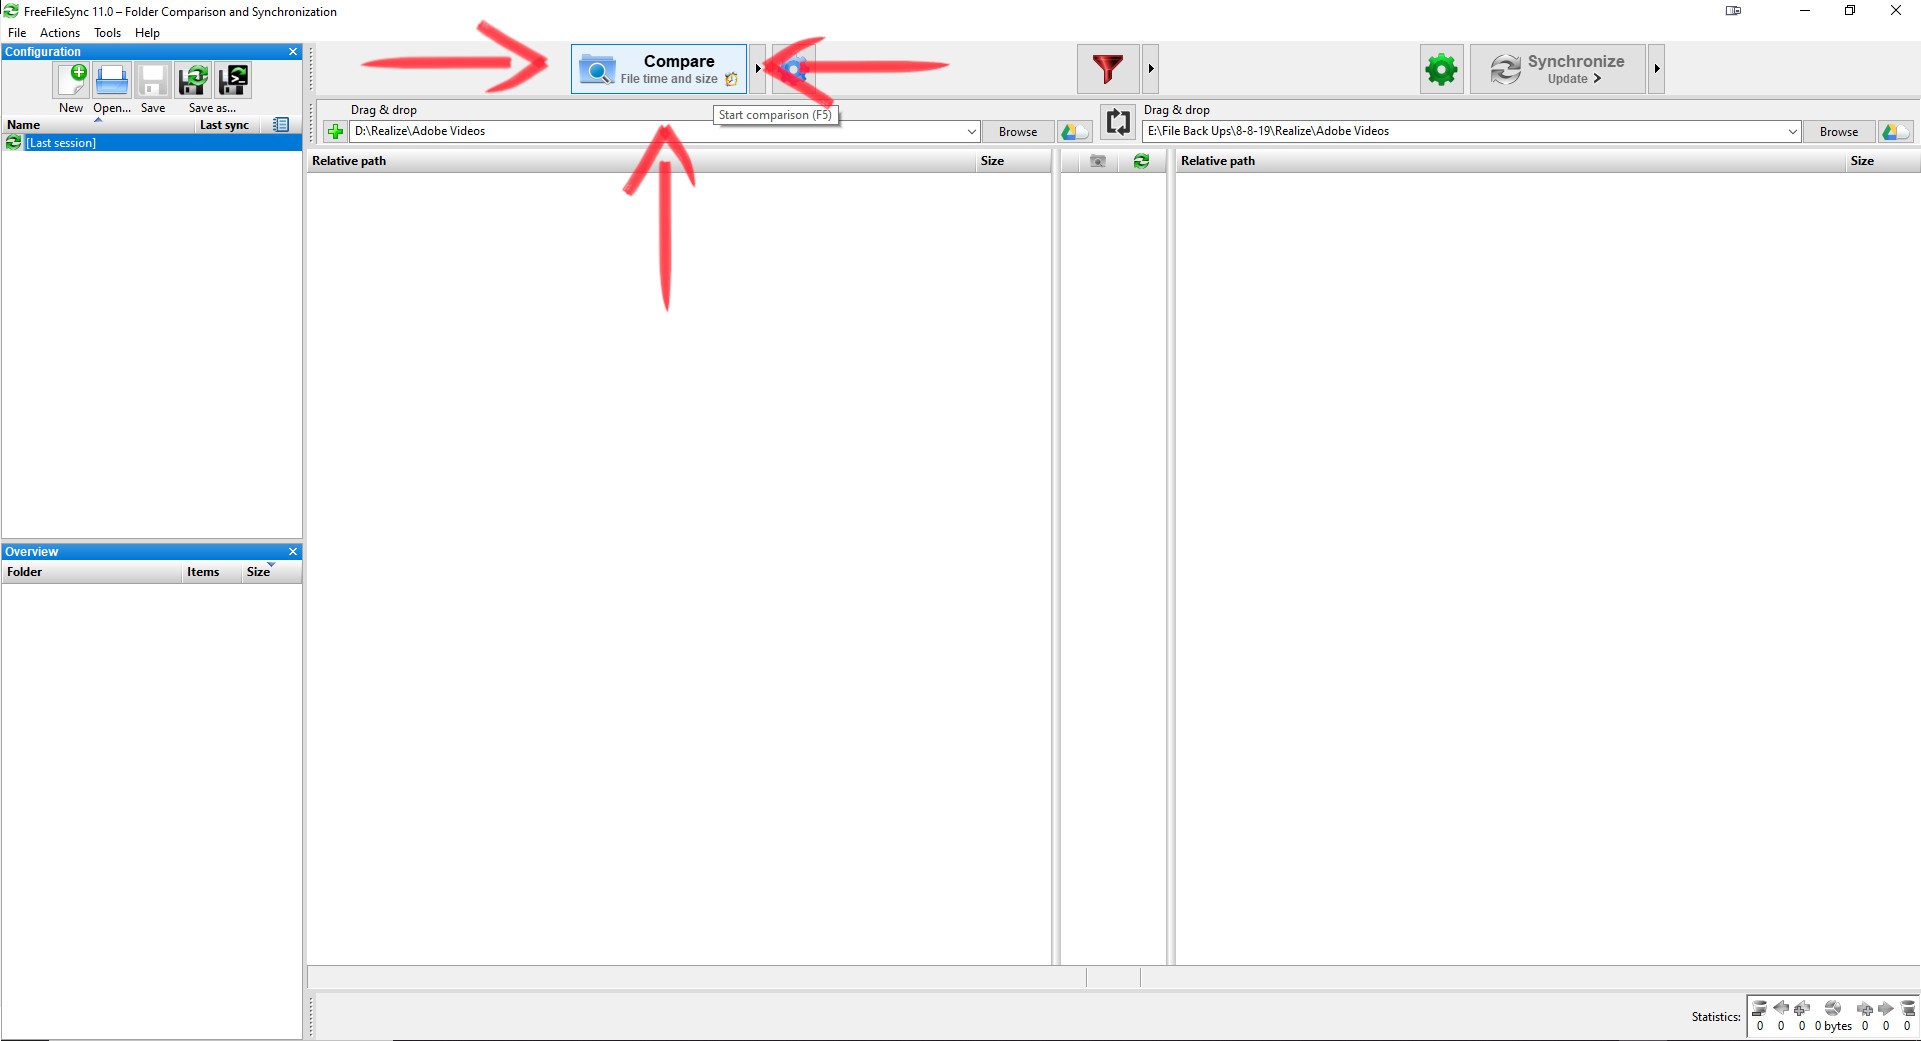
Choose your backup destination folder using the second browse button on the right. You can create a new folder here if you need to as well.
(Make sure you have an external hard drive connected first)
Unlike the Windows 10 Backup, you could opt out of using an external hard drive here, but we strongly recommend that you do use an external hard drive. If something goes wrong with your computer and your backup is on that same computer, it kind of defeats the purpose of a backup.
Step 6
Click compare to index your backup’s origin and destination folder. This will compare the files in each folder. The first time you run your backup it will all be new, but the subsequent times you run the backup this will save you a lot of time by only marking new and/or changed items to be backed up instead of overwriting everything.
Step 7
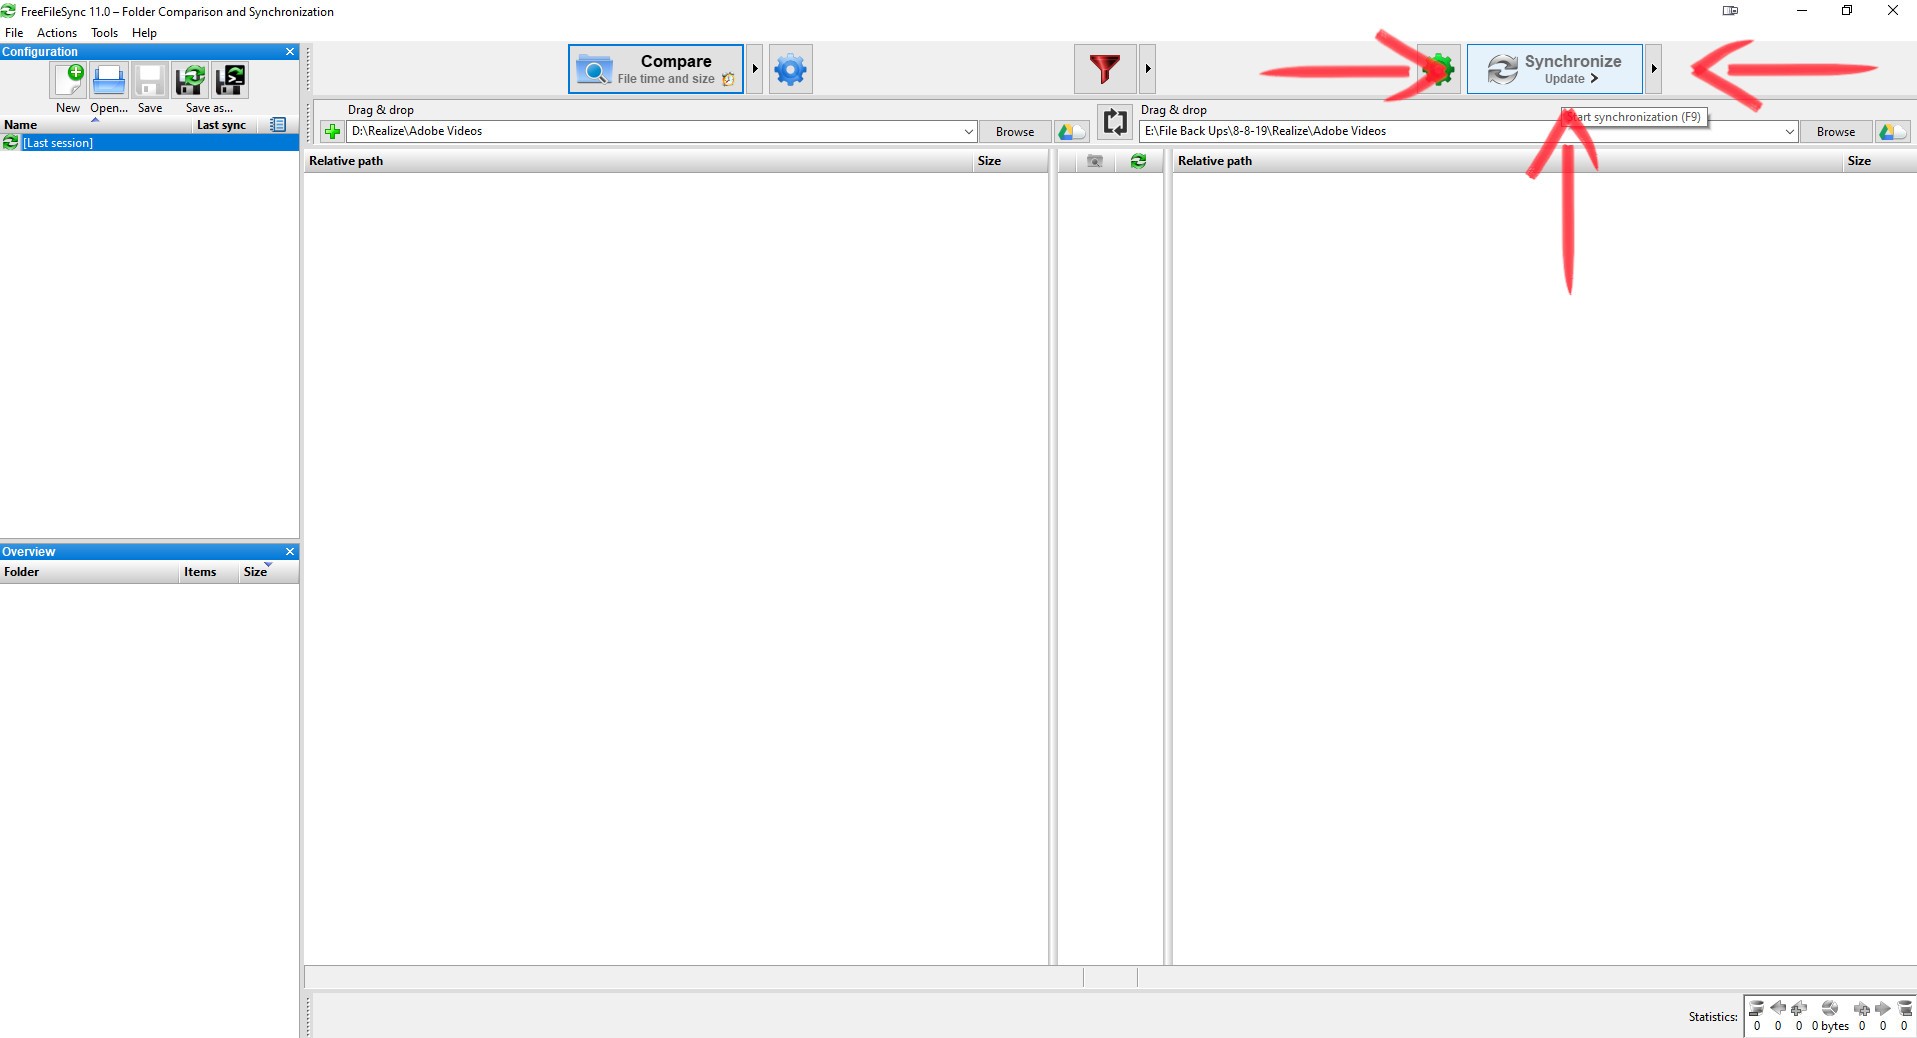
Click synchronize to open the backup window.
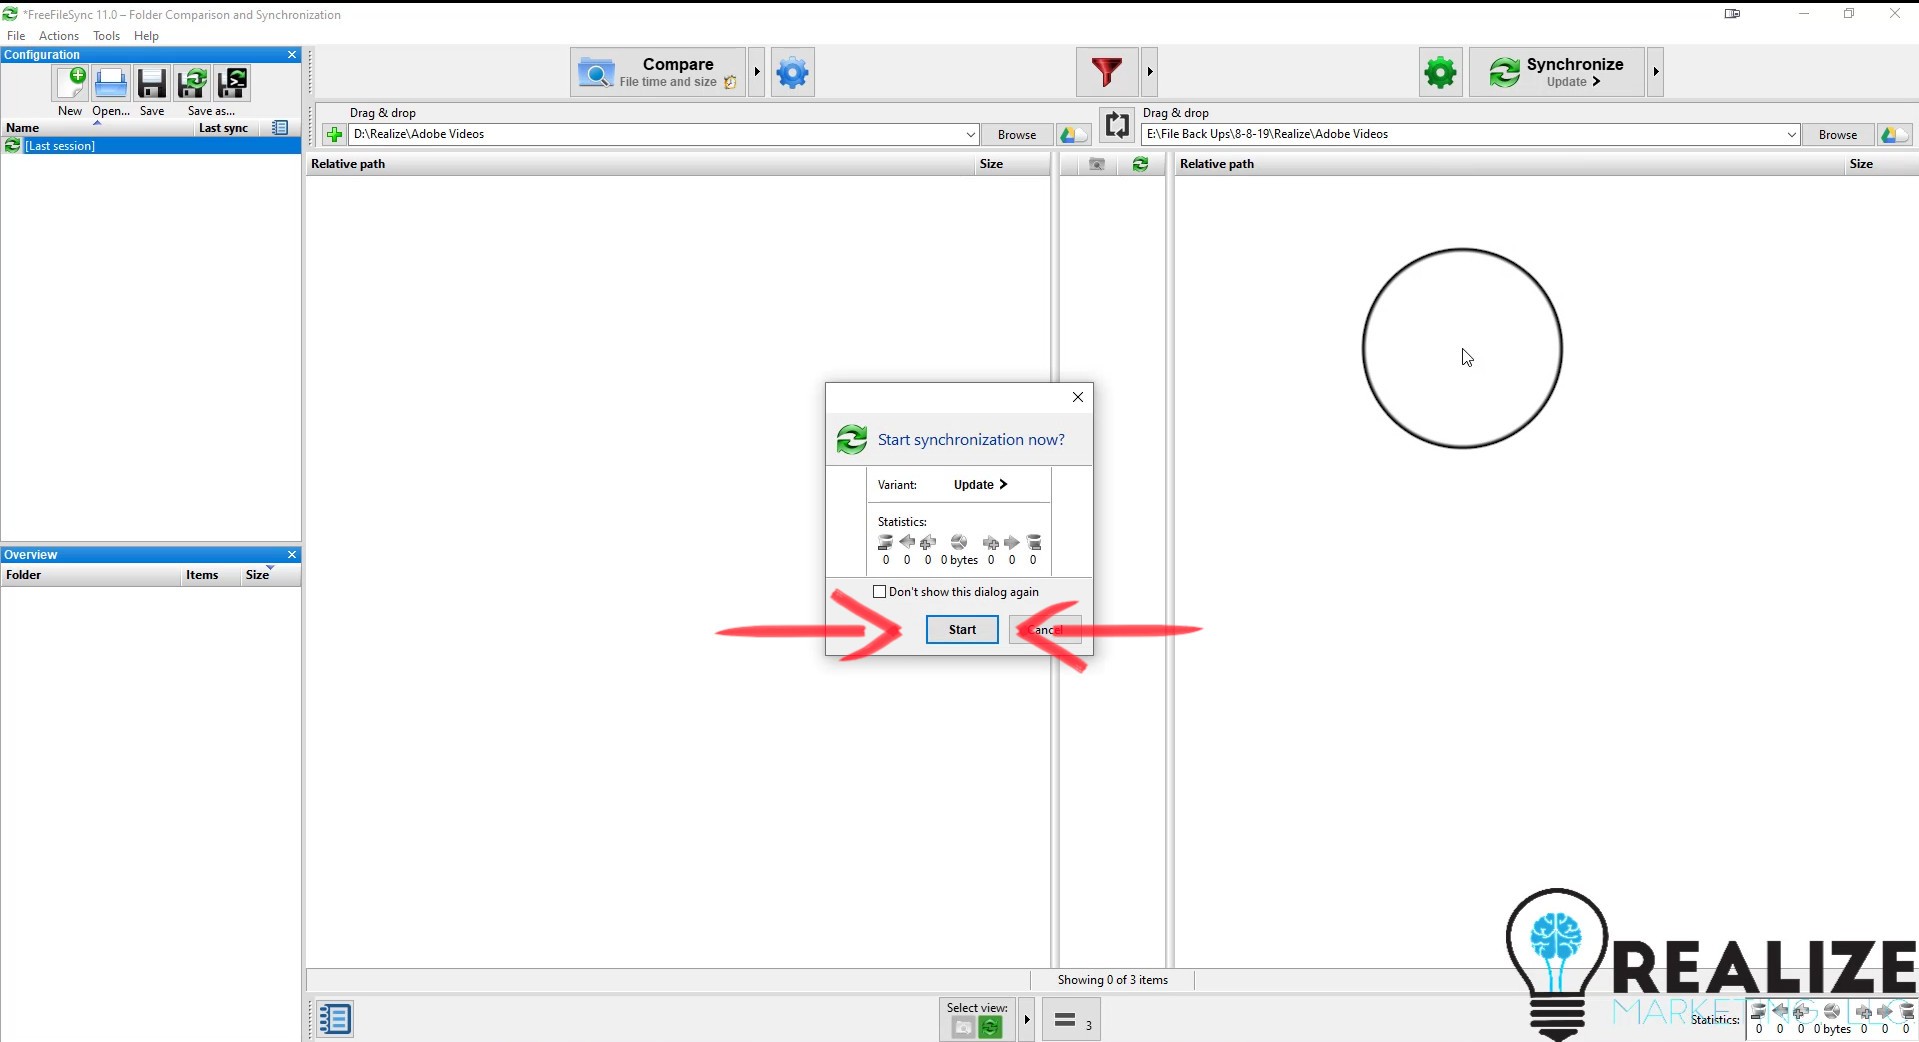
Step 8
Click start on the pop up window to start your backup. When you run your first backup it will take longer than the subsequent times, depending on the size of your backup.
You are done backing up your data!
I suggest using Free File Sync in conjunction with Windows 10 Backup. Also, remember that this method needs to be done manually although Free File Sync also does automatic Real Time File Sync, we recommend using Windows 10 Backup for your automatic backups.